Saturday, February 1, 2014

Grapefruit fun

I've been told that food is all about presentation. So... why not make your food look like fun?
Here goes... how to make your half grapefruit look fun and happy:
First, you want to select two grapefruits, one pink and one white.
Cut them open to reveal their loveliness.

Slice the grapefruits and remove half of the slices...
And voila! You have this! Pretty and yummy, too!!!

Tuesday, January 28, 2014

Alice's omelet project

Everyone has a different technique for making omelets, and this is mine. I love making omelets because they come out differently each time.
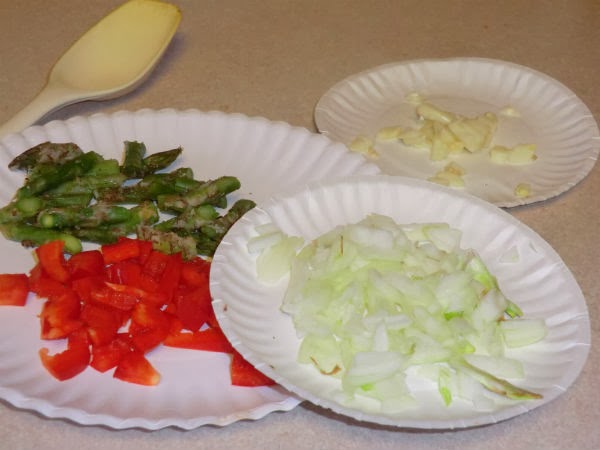
I start by chopping up vegetables, which for me, is fun because I like chopping food. For this omelet, I used onion, red pepper, garlic, and leftover asparagus.

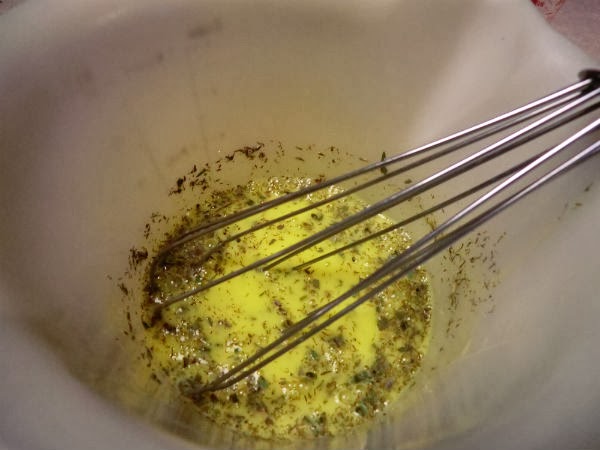
I then put some egg beaters and herbs into a mixing bowl and whished until blended. Some of the herbs that I like for eggs are dill weed, tarragon, dried chives, and garlic salt. I also use a mixed herb. I think that it's called Herbs de Provence. I am fussy and don't like pepper so my mom usually adds pepper at the table.
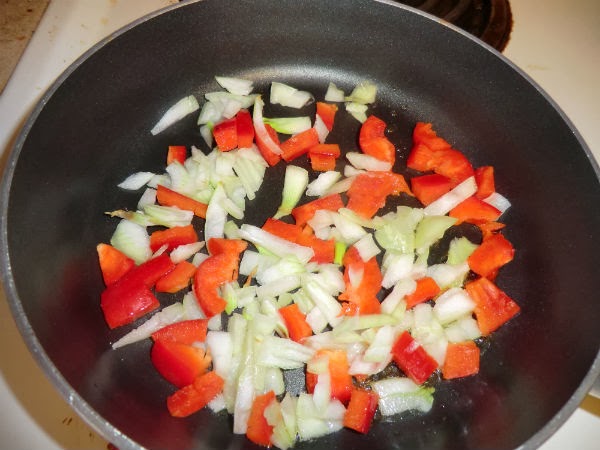
After heating up some olive oil in a fry pan, I begin to saute my vegetables, starting with the red pepper and the onion.
When the onion becomes close to transparent, I am ready to add more stuff.
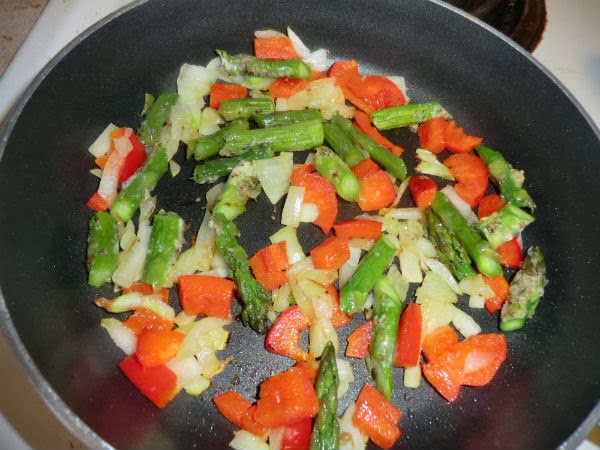
All vegetables are cooking and looking colorful! As my storyteller friends would say, "Looking good! Looking good!"
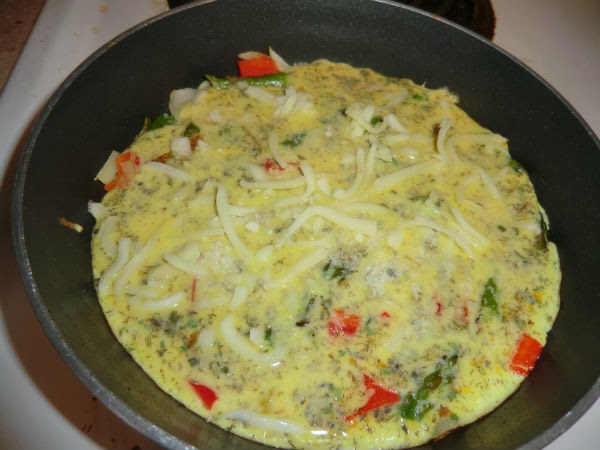
After pouring the egg mixture into the frypan, I also add some parmesan cheese and some mozzarella cheese. Not too much cheese should be added. It's best just to use a small amount to be tasty but not to overwhelm the yumminess of the eggs and vegetables!
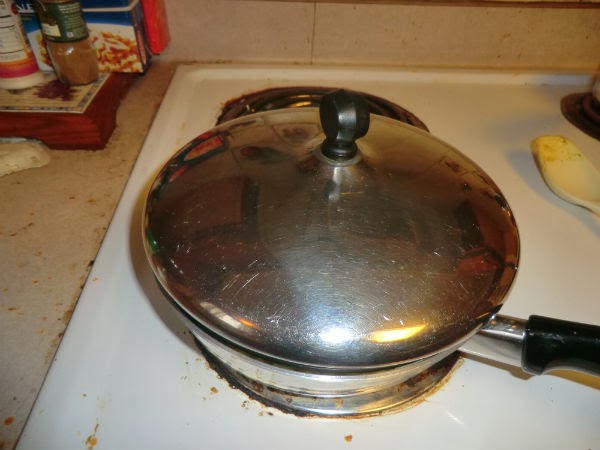
I then cover the egg mixture and let it cook in its own steam for about three minutes.
At this point, I put the omelet a plate and flip it over, back into the fry pan. I cover the pan again so that the other side can become browned.
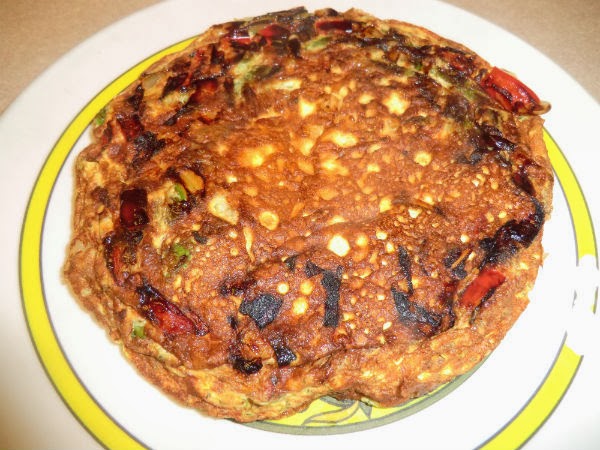
The omelet is now ready to be served!
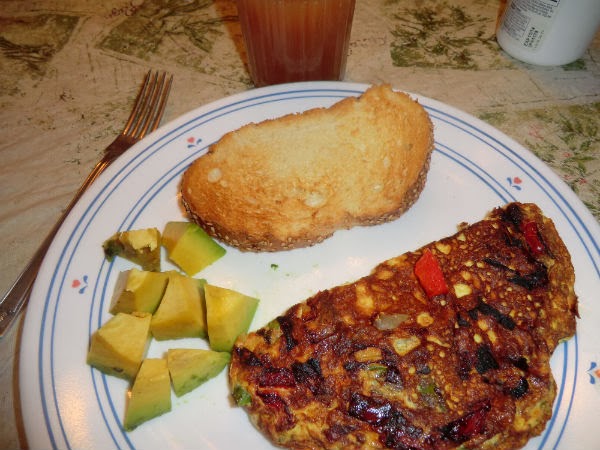
My lovely meal... half of the omelet, a piece of toast, and some avocado. My mom got the other half of the omelet.
Have fun with eggs and bon appetit!

Friday, January 3, 2014

Yum! Brownies!!!

It was far too cold to go out for a walk today. In fact, it was so cold that I ran to and from the mailbox so as to avoid lingering in the arctic wasteland, known as outside. I hope that this ends soon because I really don't like being stuck inside!! But it was so cold that most schools in the area were closed for the day.
So, anyway, I decided to spend my time in the kitchen, doing something fun... namely baking brownies. To be exact, pineapple brownies. My mom has a cookbook titled "Best of the Bake-off. It contains 2,000 recipes from 10 years of the Pillsbury Bakeoff. I think that it was published in 1959.  Well, my mom found that wonderful recipe in that book. The recipe was created by Josephine DeMarco of Chicago, Illinois. She was a "senior winner."
So, below is a illustrated guide to baking these wonderful brownies.
Your first step is to sift your dry ingredients. They are one and a half cups of flour, one teaspoon of double acting baking powder, one-half teaspoon of salt, and one-half teaspoon of cinnamon. Set aside.
The next step is to cream three-quarters of a cup of butter, gradually adding one and a half cups of granulated sugar. Three quarters of a cup of butter is one and a half sticks of butter. I prefer to use unsalted butter for baking.
Once you cream together the sugar and the butter, you'll add three eggs, one at a time and one teaspoon of vanilla extract. Then you will gradually add the dry ingredients. At this point, you will have your preliminary batter. You will need to remove one cup of batter from the bowl and place it in a separate bowl.
Here is the fun part! You will drain one cup of crushed pineapple, making sure that the liquid is removed. And then, you get to drink the pineapple juice!!! Yay!!!! (OK, so "drink the pineapple juice" wasn't actually in the original recipe, but I think that's a fine addition...)
Mix the pineapples into the one cup of batter that you placed in the separate bowl. Set aside.
Place two squares of unsweetened chocolate into a double boiler...

...melt the chocolate...

... until you have a nice, smooth consistency...
add the melted chocolate to the batter...

Blend until you get a lovely chocolate batter.
Place spoonfuls of the chocolate batter into your 9 x 13 inch pan. You should grease your pan prior to putting your batter into it. I pre-grease my pan with butter because butter is better. Shortening is often used but that is trans fat, which is now on the no-good list, but it wasn't in 1959...

I use a butter knife to spread the batter into a layer on the bottom of the pan.

Next, I place the batter with the pineapple on top of the first chocolate layer. Once again, I use a spoon to put the batter in the pan. Then I use a butter knife to spread the batter to form the second layer.

The is the second layer of the brownies.

Lastly, I add all of the remaining chocolate batter to the pan and spread that on top of the second layer. Altogether, there will be three layers in the batter. Then, the pan is placed in an oven that has been preheated to 375 degrees. I bake the brownies for 35 minutes. When you remove your pan, use a toothpick to test the brownies. If the toothpick comes out clean, place the pan on top of a metal rack or a trivet and let the brownies cool for fifteen minutes.
Here are the brownies, right out of the oven!

Yum! Brownies!

Even better with tea! Enjoy!!!